Soldering for the Model Ship Builder
- Updated on:
- Written by Gary Renshaw
Soldering can be useful skill for the model ship builder to have. It is probably not something that you will use every day but when you do need to solder some small items then it is handy to have a basic understanding of the process.
Soldering
Soldering can be a useful skill for the model ship builder to have. It is probably not something that you will use every day but when you do need to solder some small items then it is handy to have a basic understanding of the process.
Many modelers struggle with soldering because they don’t know how to go about it or they don’t follow some of the basic soldering techniques.
In this short passage I am going to talk about soldering as it relates to the ship modeler and how to get successful results. I am not expecting people to become experts after reading this but hopefully you will have enough information to be able to give soldering a go.
What is soldering?
There are many processes that are commonly referred to as soldering but not all are suitable for the ship modeler. They all have one thing in common; that is they all use a fusible metal alloy (solder) to join together pieces of metal.
Some types of soldering require quite high temperatures or specialist equipment while other types of soldering can be successfully carried out by the average modeller using relatively inexpensive tools and equipment. The sort of soldering that is useful to the model ship builder is commonly known as soft soldering. Soft soldering is usually done using a hand held soldering iron and solder with a melting point of 180 to 190OC as is commonly used in the manufacture and repair of electronic equipment. What can soldering be used for? Soft soldering can be used to join a variety of different metals used in ship model building including copper, brass, steel and tin. Some of the common items that can be created using soldered metal parts are: railings, ladders, small metal structures, deadeye strops, ratlines, hinges, metal propellers, metal rudders, propeller shafts/frames, bell cranks, linkages, radars, wire terminations etc. In-fact just about any component can be fabricated from metal pieces soldered together. It is worth noting that aluminium and stainless steel are generally not able to be soldered using this type of soft soldering.
Soldering Irons
There are many different types of soldering iron available that are suitable for soft soldering, from the simple hobby soldering iron to the variable temperature controlled soldering iron. The sort of things that are going to be soldered will influence what type and size of soldering iron will be required. Larger components require more heat, therefore a larger capacity soldering iron. A good variable temperature controlled soldering iron can make a difference in that it will allow you to tackle a larger variety of jobs. In saying that, the simple plug-in / turn-on type soldering iron can still be used for most small joints.
Types of solder
There are many different types of soft solder for a variety of applications. Most are an alloy of tin and some other metals. The type of solder that will work best for the ship modellers is again general electronics solder which is a Tin/Lead alloy (SnPb60/40 or SnPb63/37). This is easy to obtain at the hardware store or an electronic components store. This type of solder is available in various sizes (diameters) so consider how big the things are that you need to join. I would recommend a small diameter solder for most model ship building tasks.
Flux
Flux is an important item when soft soldering as it helps to remove oxides from surface of the metal which allows the solder to fuse to base metal and aids in solder flow. Any of the available types of flux for soft soldering are suitable but some create much more of a mess than others. My recommendation would be to use a clear liquid flux as it is much easier to clean up than resin or paste types of flux. Much of the solder available now comes with a resin flux embedded in the core of the solder but it is still worthwhile using additional flux on all parts prior to soldering.
Tools
Soft soldering only requires the use of a few simple tools but there is scope to employ more specialist tools to make some things easier. The soldering iron, pliers and side-cutters will be required for most soldering tasks with things like, clamps, tweezers, vice, jigs etc making things easier to hold parts for soldering. A variety of small files will be useful to clean up soldered joints and a small stiff bristled brush for removing flux with solvent.
Consumables
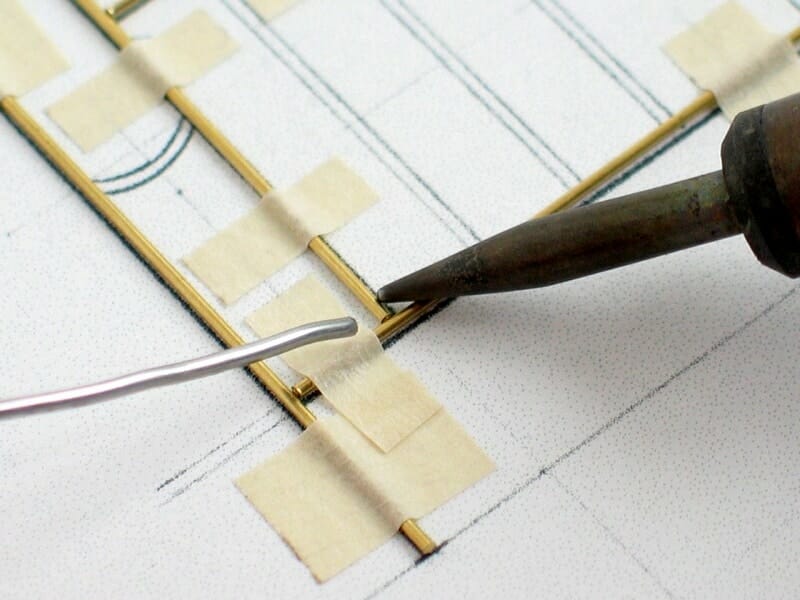
The common consumables that will be required for soldering are: Flux to help clean the area to be soldered, Solvent for chemical cleaning of components and removal of flux after soldering, (denatured alcohol or methylated spirits), Paper towel or damp sponge for cleaning the soldering iron tip, and Fine sandpaper, steel wool or ink eraser for mechanical cleaning/preparing the components prior to soldering. Holding Parts. Soft soldering is one of those tasks that require both hands, that is, one holding the soldering iron and one holding/feeding the solder to the job. This means that all of the pieces to be joined need to be held somehow. This becomes a little more difficult as the parts become smaller and more difficult to hold. There are a number of ways to hold parts for soldering including: Use double sided tape or masking tape to hold items down to a piece of timber, Construct jigs to hold parts still, Use clamps or weights to hold parts still, Use heat-sinks to stop heat travelling to previously soldered joints, A mixture of all may be required for some complex soldering tasks.
Important considerations for soldering
There are a few things that are worth paying some attention to when soldering: Consider your own safety – There are dangers with prolonged exposure to lead so wash your hands after soldering, wear eye protection, work in a well ventilated area and try not to breath the fumes, remember the parts stay hot for some time so beware of burning yourself. It is important to make sure that all components to be soldered are cleaned immediately prior to soldering. A mechanical clean with fine sandpaper, steel wool or ink eraser to remove any oxides followed by a chemical clean with a solvent to remove any debris will make soldering so much easier. Plan the construction of complex parts so that larger joints requiring more heat are completed first. Always use clamps, jigs, heat sinks and tape to keep parts in place, don’t try to hold or reposition parts with your fingers, you will get burnt. Keep the amount of heat applied during soldering to the minimum required to do the job – be quick
Bigger parts require more heat – the whole part has to reach the melting temp of the solder. Heat the parts and then apply solder to the joint not to the tip of the soldering iron.
The Soldering Process
Lorem ipsum dolor sit amet, consectetur adipiscing elit. Ut elit tellus, luctus nec ullamcorper mattis, pulvinar dapibus leo.
Soldering is a relatively straight forward process and good results can be achieved by following the simple steps below. Clean all parts to be soldered immediately prior to soldering, first by mechanical cleaning, ie by scrubbing, filing or sanding the areas to be soldered, then by a chemical clean with solvent. Turn on the soldering iron and allow it to heat up. Position and hold parts so that they will not move during soldering using jigs, clamps tape as required.
For more complex parts place heat sinks to stop heat travelling to previously soldered joints. Add flux to the area to be soldered. Set soldering iron temperature (approx 320o C if you are using a variable temp iron) Clean the tip of the hot soldering iron by wiping it on paper towel or a damp sponge. Tin the tip of the soldering iron by melting a small amount of solder onto it. Position the tip of the soldering iron so that it touches both parts to be joined. There should be enough solder on the tip so that it forms a small heat bridge between the tip and the parts. After a short time try to touch the end of the solder to the heated part. If the parts are hot enough the solder should melt and flow into the joint. Most joints only require a very small amount of solder. Quickly remove iron from the parts. Allow the parts to cool. Inspect the joint to see that the solder has flowed to both parts. If not the joint can be reheated and more solder added. Clean up the joint by removing the flux with a small stiff bristled brush and solvent. Excess solder can be cleaned up with a small file. Soldering, it is that easy, anyone can do it.
A little practice and you will be surprised at what you can achieve. With care, some quite complicated structures can be created by soldering metal parts together. For most of us though, just being able to join two simple parts will often be all that is required.
Propellers – A selection of home made model ship propellers that have been soldered together.

Radar 1 – The start of a radar being soldered together using double sided tape on a wooden former to get the correct shape.
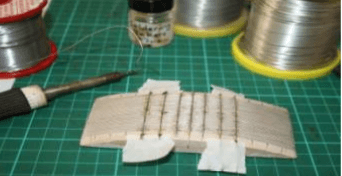
Radar 2 – Support frames soldered to the radar helps to give it strength.
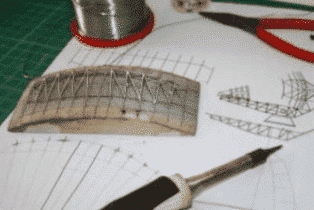
Radar 3 – The completed radar ready to paint.

Railings 1 – Small pieces of tinned copper wire soldered together using a wooden jig to make railings for a model ship.
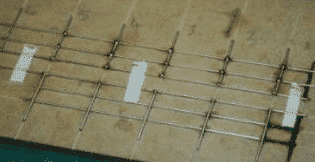
Right: Railings 2 – Railings made using masking tape to hold parts still.
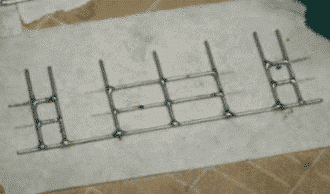
Key Takeaways
- Soldering can be a useful skill for model ship builders, suitable for joining various metals like copper and brass.
- The article discusses different types of soldering, focusing on soft soldering using a handheld iron.
- It highlights the importance of using the right tools, solder, and flux for effective soldering.
- Proper cleaning, safety measures, and technique are essential for successful soldering outcomes.
Learn The Art Of Building A Model Ship
Get started in wooden model ship building today


