How To Do Deck Planking On Wooden Model Ships
- Updated on:
- Written by Gary Renshaw
Learn How To Do The Deck Planking on Wooden Model Ship With This Comprehensive Build Guide From Modelers Central.
In this article we will be considering the decks most widely found in wooden model ship kits. We will also consider the laying of the deck planks and the common methods to achieve the caulking effect between the deck planks on wooden model ships. Lastly, we will consider the joggling of deck planks.
What is the deck on a model ship?
In a wooden model ship the deck planks are laid on what is called a false deck. The false deck will be part of the 2mm laser cut plywood in the kit. Two types of false decks are shown below. Photo 1 shows a false deck where the bulkhead frames of the hull do not come above the deck.

Photo 2 shows a false deck where the bulkhead frames do come up above the deck. There are notches in the false deck to allow this to occur. The parts of the bulkhead frames that come up above the deck are called bulkhead horns.
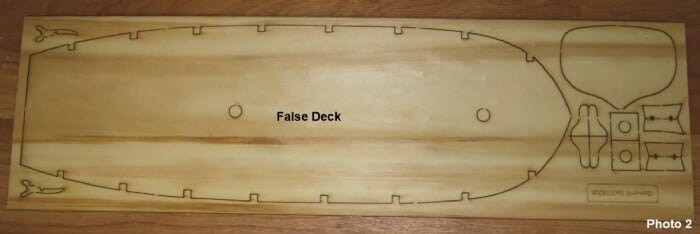
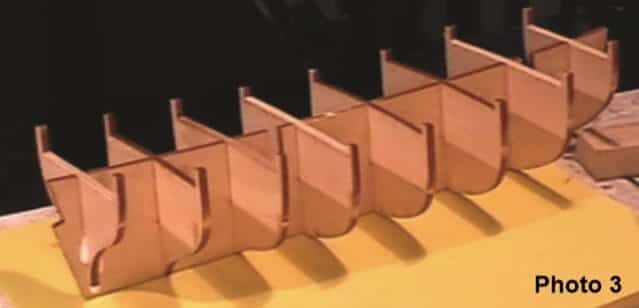
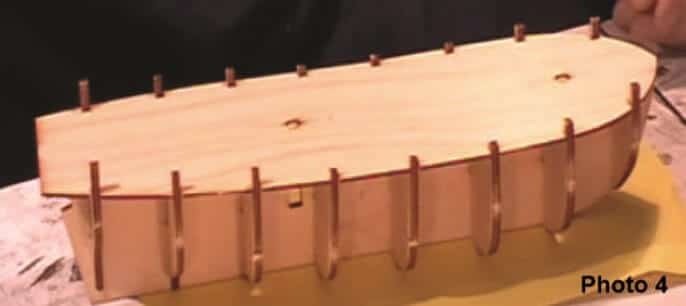
Photo 3 shows the assembled keel and bulkhead frames of a model which has bulkhead horns. Photo 4 shows the false deck fitted to this model.
The different approaches determine how the bulwark is established on the particular model.
The False Deck
The false deck is glued into position across the bulkhead frames of the model. When to fit and glue the false deck into position is an important consideration.
You could fit the false deck into position after the keel and bulkhead frames have been glued in position and before you start the hull planking. This approach has the advantage of adding strength to the whole hull. The disadvantage is that you will have to fit the deck planks to the false deck while it is on the model. This could be fiddly.
Alternatively, you could fit the false deck after you have finished planking the hull. With this approach, you would plank the false deck before fitting it to the completed hull. The advantage of this approach is that planking the false deck is easier. The disadvantage is that the whole hull structure is not as strong.
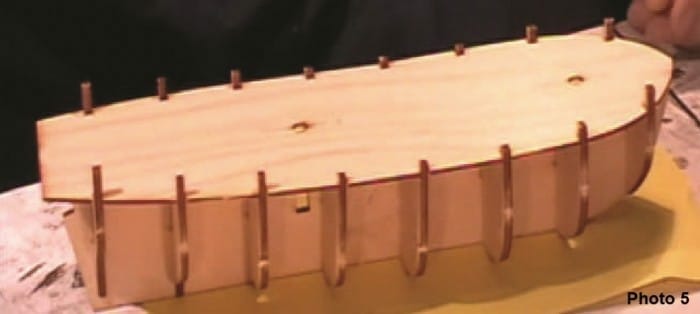
Sometimes the decision is already made for you. If your model has bulkhead frames that come above the deck—the bulkhead horns—then you will be required to fit the false deck before planking the hull. You will then plank the deck later—Photo 5.
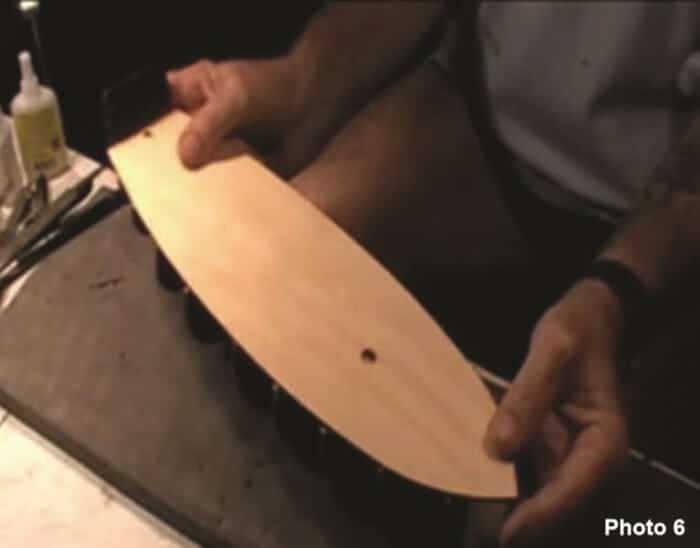
On the other hand, if your model has a false deck where the bulkhead frames of the hull do not come above the deck then you have a choice—either to fit the false deck before planking the hull and plank the deck later or to plank the hull and plank the false deck and fit it later—Photo 6. This is a personal preference.
In Photo 6 the modeler has chosen to fit the false deck before planking the hull and will plank the deck later.
Deck Planking
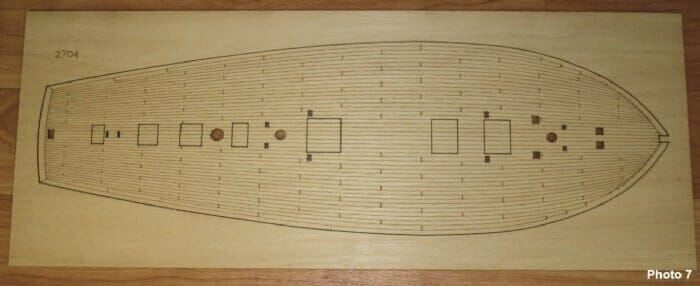
Some kits come with a decorative timber plywood sheet that is laser scribed to simulate the deck planks. This sheet is simply glued into position across the bulkhead frames
However, most kits on the market will come with a stock of timber to be used as the deck planking.
The deck planks of a real ship were made from teak and were laid in lengths of either 6, 9 or 12 feet and varying in width from 6 to 12 inches. In metric terms, these lengths would be 1.8m, 2.7m or 3.6m and widths of 15cm to 30cm.
As the deck planks were continually scrubbed with a stone and bleached by the sun they became a light grey to white colour. To simulate this colour on a model the timber used for deck planking in a kit is a decorative timber veneer such as boxwood, silver ash or tanganika. The width of these planks will vary depending upon the scale of the model you are building. However, the deck plank width is usually 3, 4 or 5mm.
Caulking
On a real ship, the deck needed to be watertight. Once the planks were laid in position on the deck the gaps between the planks were sealed by a process called caulking. Caulking involved forcing a quantity of oakum (a rough fibre), or old untwisted ropes, into the gaps where the planks are joined. After the oakum was driven into the gaps, hot melted pitch or tar was poured into the groove to stop the water from rotting the oakum. Once the tar had set and any residue removed, a thin black line was showing between the deck planks.
To simulate the caulking of the deck on a model there are a number of approaches that can be applied. As with many things in model shipbuilding, there is no one right or wrong way—just different ways to achieve the same goal. It comes down to your own personal preference.
A couple of approaches are presented below:
- Mark one edge of each deck plank with a black marker pen. Run a trial with a few planks to ensure that the marker pen does not weep into the timber or that the clear polyurethane varnish that you will be using to finish the deck does not dissolve the black colour when it is later applied.
- Apply a dark soft lead pencil along the edge and end of bundled planks. This method is presented in more detail later.
- The false deck can be painted black before the deck planks are applied and a slight gap is left between them.
- Leave a slight gap between the deck planks which is later filled with black sewing thread which is first pulled through rigging wax
The suggested method to stimulate caulking
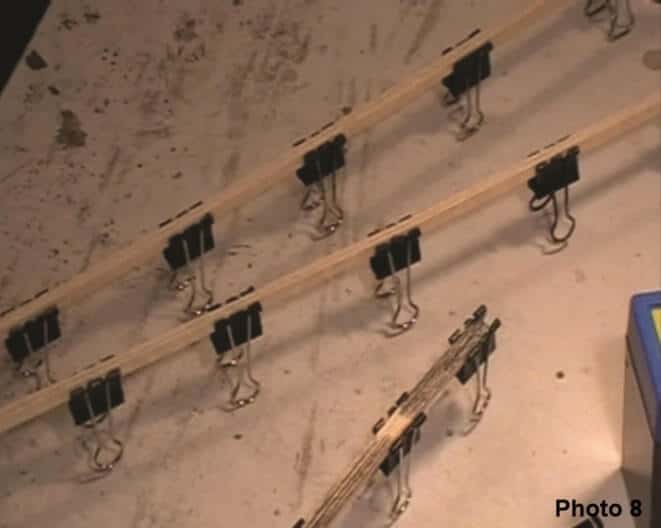
The following method to simulate the caulking on a model is suggested. Gather the deck planks in your kit into bundles of 6 to 8. Use bulldog clips to hold them aligned together—Photo 8.
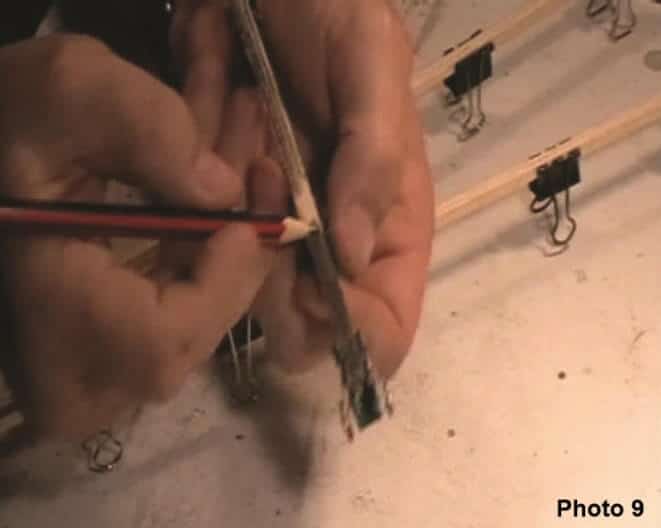
Then using a soft lead pencil rub the pencil across the edges of the bundled planks along their length. Repeat for the other side of the planks. Repeat this for all the bundles of deck planks you need to cover the false deck—Photo 9.
When the deck planks are laid over the false deck the thin black line to be achieved to simulate the caulking is very effective. This approach also has the advantages of not weeping into the deck plank and is not affected by clear polyurethane varnish.
Plank Length
On a number of ship model kits, the instructions simply call for the deck planks to be laid as full-length strips over the false deck. This is acceptable, however staggering the deck planks will enhance your model’s overall appearance. The staggering effect can be achieved either by:
- Laying the deck planks in their full length along the deck and using a pencil to mark the pattern, or
- Cutting you deck planks to an appropriate length.
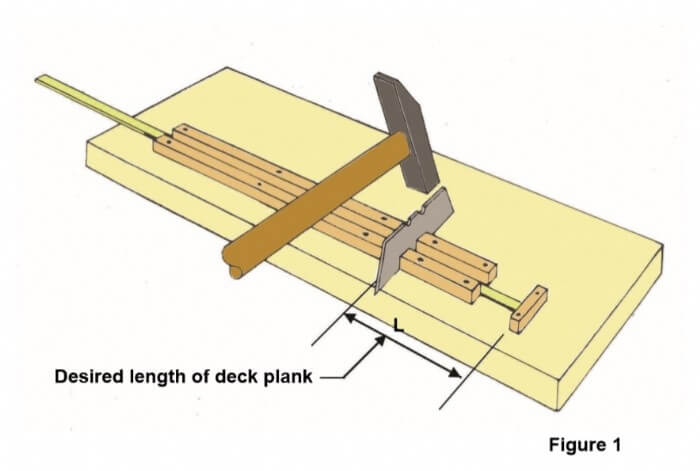
The jig shown in Figure 1 below can be easily made from scrap timber. The jig is ideal to use to cut your deck planks to the desired length for the scale of your model or to your chosen length.
Some research can clarify the plank length to use on your model and then to apply the relevant scale to determine the deck plank length you will use.
Alternatively, you may simply choose to use a length of either 80mm or 100mm as this would not look out of place for the range of scale models on the market.
Simulate the caulking using full lengths of planking before you cut the planks to your desired length.
Staggering Deck Planks
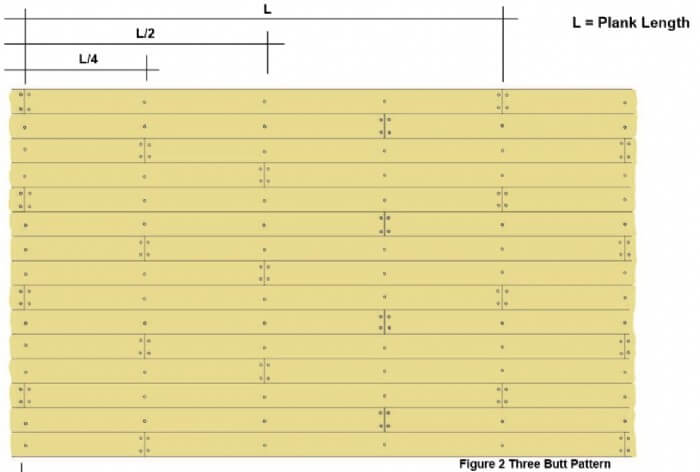
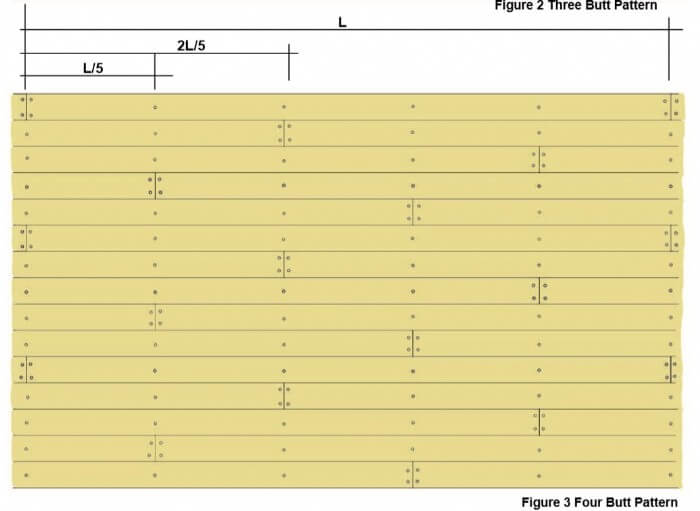
As mentioned previously the deck planks of a real ship were laid in lengths of either 6, 9 or 12 feet. The butt joints of the planks were staggered as they were laid along the deck length. The pattern of butt joints depends on the period of the ship. Some research on your model can clarify this for you.
Alternatively, you may simply choose to use one particular pattern. Figures 2 & 3 below show two butt patterns used. The important issues to consider is that neither the deck plank butt pattern, the length of the planks or the plank width should look too crowded, cramped or out of place. The overall effect needs to be pleasing to the eye.
Trennells (Tree Nails)
On a real ship, the trennells were the pegs that held the deck planks in place. They were made of oak or other hardwood.
To create a more realistic look to your model you may wish to simulate the trennells. To achieve this effect refer to the staggering butt pattern chosen and draw very light pencil lines across the deck. Then mark with a fine sharp point small indentations in the deck planks according to the butt pattern. Finally, carefully use a pen with Indian ink to fill the indentations.
Planking the Deck
On a real ship, the plank that was laid along the centre line of the ship was called the king plank. The other deck planks were then laid adjacent and parallel to this plank and on either side moving towards the bulwarks (sides) of the ship.
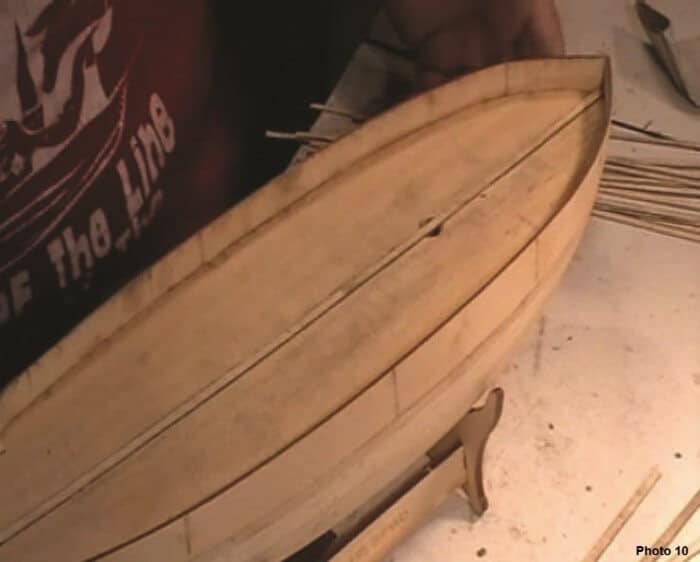
On your model, you can either choose to lay a king plank—Photo 10, and plank the deck in your desired pattern, or you can simply draw a line down the centre of the deck and plank either side of this line in your desired pattern. Either is acceptable.
It is important as you progress across the deck with you deck planks that you clearly mark out with a pencil where any mast holes, hatches or gratings are located. It is very easy to forget this simple step as you enthusiastically plank the deck.
Now that you have decided what method you will use to simulate the caulking, the planking pattern and the plank lengths it’s now time to start laying the deck planks.
At the bow and at the stern you will need to trim the planks where they meet the bulwark. To do this simply fit 3 or 4 planks parallel to the king plank or the centre planking line—Photo 11.
Then using a pencil and the bulwark as a guide mark a line across the planks—this line will be parallel with the bulwark at that point—Photo 12
Then use scissors to trim the deck planks along the pencil line. Trial fit the planks into place—Photo 13—and fractionally fit if needed.
Repeat this process for all the planks as you progress across the deck.
This is the simplest method of butting the deck planks to the bulwark. A more detailed method is called joggling which will be presented later.
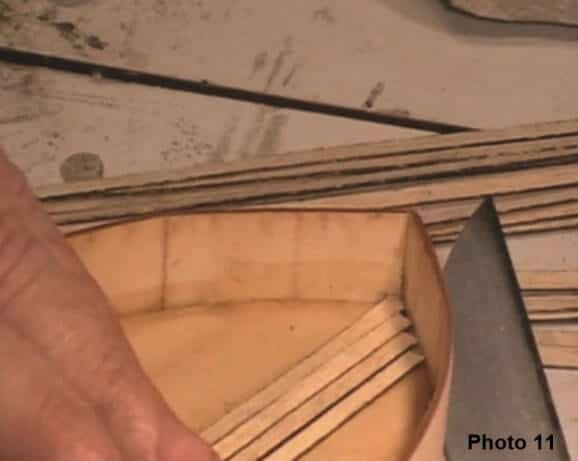

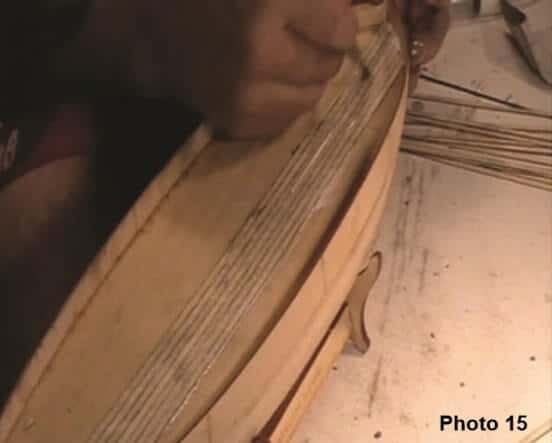
The next step is to glue the planks into place. For the planks, you have just shaped to fit into the bow or stern area use either PVA glue of contact glue to fix the planks in place—Photo 14. Once you have laid the planks in position make sure you run a chisel blade over the length of the planks to remove any air bubbles that may be under the veneer strips—Photo 15.

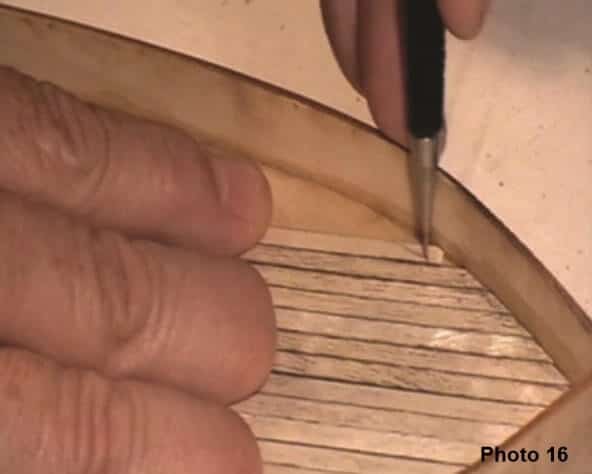
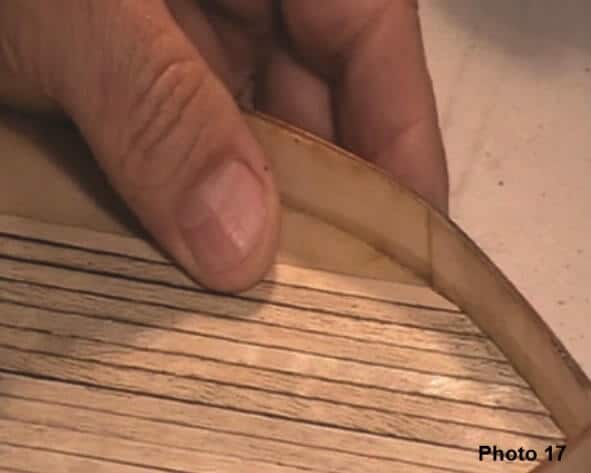
Continue the above process carefully shaping the planks that meet the bulwark—Photo 16 & 17.
We will now continue on to finish planking the deck.
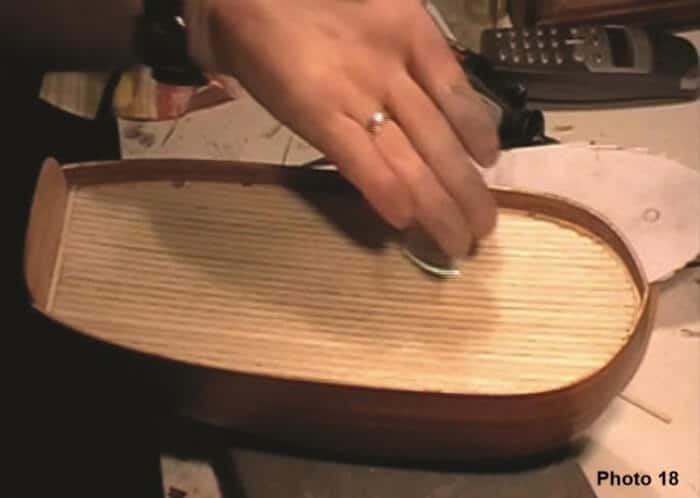
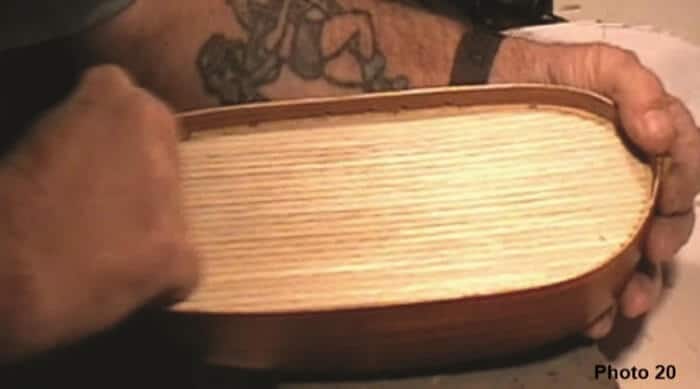
Once you have finished planking the deck do not use sandpaper to finish the deck. To achieve a smooth finish that does not cause the graphite from the pencil used to simulate the caulking, use a small piece of glass with at least one edge clean cut and sharp. Hold the hull firmly and scrape the glass over the deck planks. This has the effect of creating an exceptionally clean and smooth deck. To finish the deck apply a couple of coats of clear satin or matt polyurethane varnish. Photos 18, 19 & 20.

Joggling Deck Planks
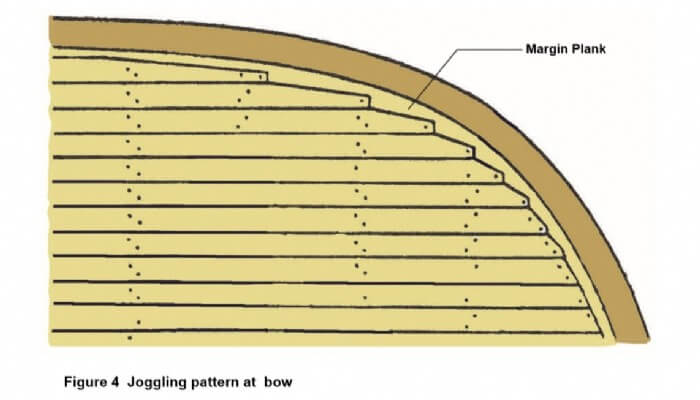
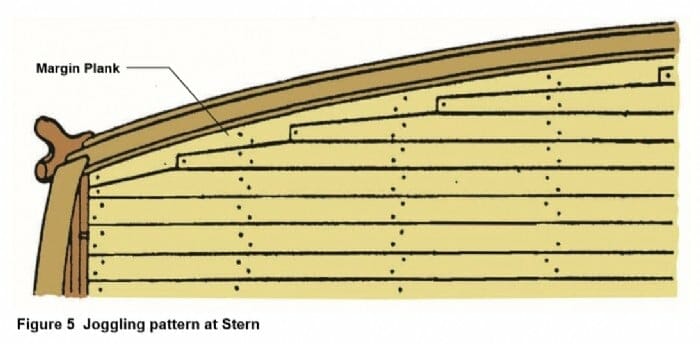
The planks that runs around the edge of the ship that butt against the bulwark are called the margin planks. When a deck plank meets a margin plank at a curve, it is joggled. This will occur at the bow and the stern of the ship. Historically there were several methods of joggling. Research will tell you which method was used during the period of the ship you are modelling.
Joggling avoids any sharp pointed joints between the deck planks and the margin plank and adds to the overall strength of the deck structure. The angle at which the margin plank and the deck plank meet is called the snipe. The general rule is “With the snipe (angle) more than twice the plank’s thickness, the plank will be joggled into the margin plank with a butt not less than half the plank’s width.
Joggling the deck planks where they meet the margin plank will add authenticity and a professional touch to your model.
Deck Planking DVD
View the Guide To Deck Planking DVD for further tips and techniques.

Learn The Art Of Building A Model Ship
Get started in wooden model ship building today


