Guide to Model Ship Deck Furniture & Fittings
- Updated on:
- Written by Gary Renshaw
In this post, we will be discussing the range of deck fittings generally found in a wooden model ship kit. The fittings presented are a cross-section of the various types of deck fittings and are not an exhaustive or definitive list.
The location of the different fittings on the deck will vary from kit to kit and may also vary according to the type of vessel being built. The exact location of a deck fitting will be determined from the kit plans. An important point to note is that all deck fittings are to be fitted before the rigging of the masts is started.
Great care needs to be taken when fitting cleats or eye bolts to the deck firstly, to get them in the correct location and secondly, to make sure all are fitted. It will be very difficult to fit these small parts when the masts and rigging are in place. Be very systematic in how you fit these parts by marking them off on the plans are you progress.
As we progress through the deck fittings below the purpose of each part along with a sample will be presented. When fixing the deck fitting in place normal PVA glue can be used. Some parts that may be under some tension such as pin rails, may need to be fixed in place with super glue or a small amount of a two-part epoxy glue. The most common types of deck fittings are presented below.
1. Belaying Pins
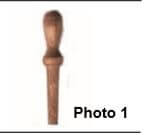
Belaying pins are either wood or brass and are fitted to pin rails. The running rigging is fastened and tied-off to the belaying pins. Photo 1 shows a belaying pin.
2. Bittheads
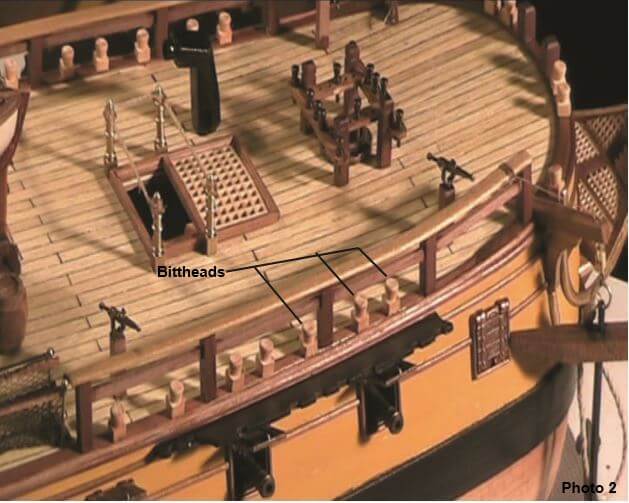
Bittheads or bollards are used to secure heavy ropes from the winches, capstan or yards.
As the bittheads may be under some tension to add some additional strength to fixing them to the deck location you can drill a 1mm hole into its base and glue a 10mm length of 1mm brass wire in place. Then drill the same size hole into the location where the bitthead is to be fitted and then glue the bitthead in place. From Photo 2 you can see the bittheads fitted around the cap rail.
3. Pin Rails
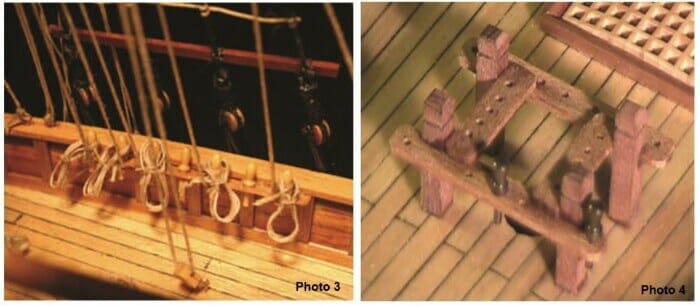
Pin rails are fixed around the inside of the bulwark and at the base of a mast. Belaying pins are located in holes in the pin rails. The running rigging is tied-off to these belaying pins.
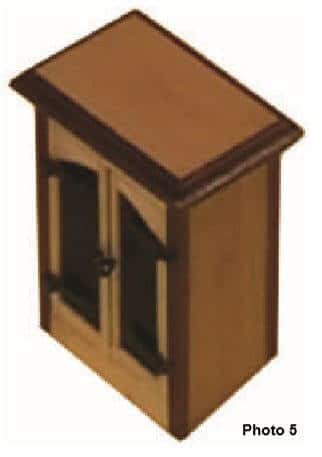
Photo 3 shows the pin rail fixed to the inside of the bulwark and just below the cap rail. Photo 4 shows the pin rail fixed around the location where the main mast is to be fitted. You will need to refer to the kits plans for the exact location of the pin rails.
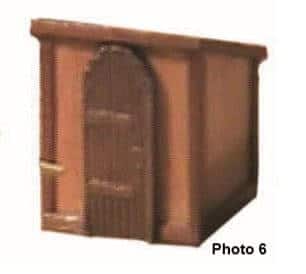
4. Deckhouses & Companionways
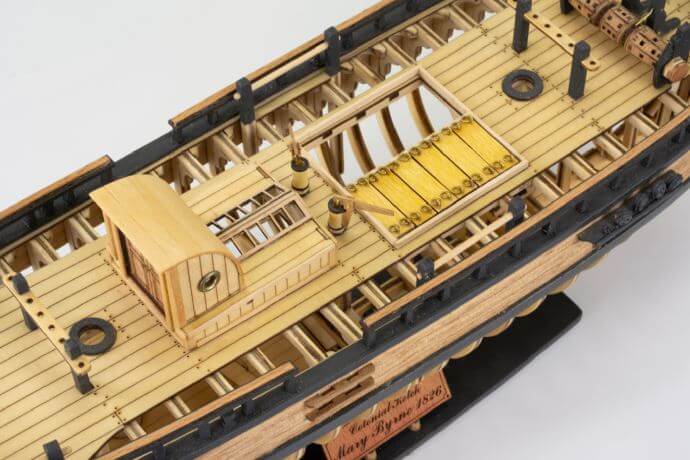
Deckhouses differed with every vessel. Access to the deckhouse was by a door way from the deck.
On smaller vessels access to the lower decks and living space was by a companionway. To allow head room the aft end of the companionway was higher than the forward end. A small door was the way of entry with a ladder fitted.
Deckhouses and companionways are usually assembled from 2mm plywood. They are also planked or covered with decorative veneer timber supplied in the kit.
These deck fittings should be lacquered or painted before fixing to their deck location
5. Skylights
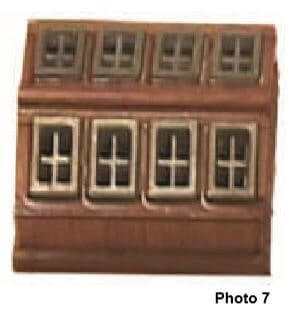
Skylights allowed natural light to enter the cabin or gunroom of the vessel.
Skylights are usually assembled from 2mm plywood. They are also planked or covered with decorative veneer timber supplied in the kit. These deck fittings should be lacquered or painted before fixing to their deck location.
To create a realistic look to the skylights an opaque blue/grey film can be fitted to the inside of the skylights.
The exact location of the skylight on the deck will be determined from the kit plans.
6. Gratings
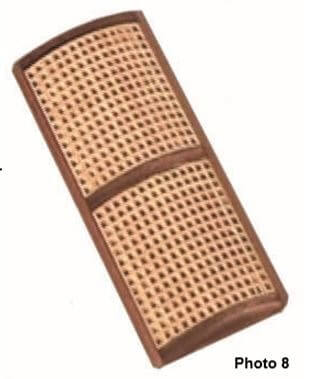
Most vessels had gratings. They were used to provide ventilation and light to the lower decks. During rough and heavy weather the gratings were battened down with tarpaulin which was an oiled or tarred canvas cover.
The gratings supplied in a kit usually need to be assembled from pre-cut pieces. Care needs to be taken when assembling the gratings. After assembling them you can dip them in a container of water diluted PVA glue for a few moments and then placed on some absorbent paper to dry.
Use the timbers supplied in the kit to construct the grating frames. All the dimensions will be given in the kit plans
7. Hatchways
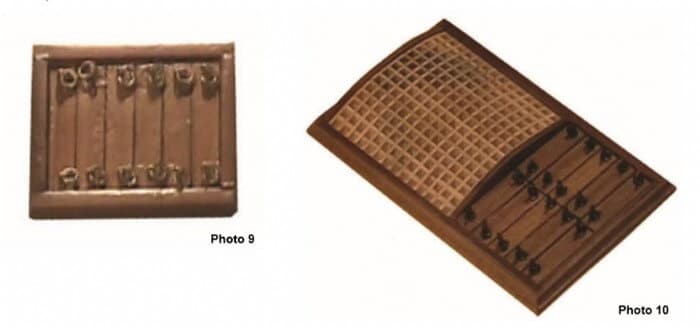
Hatchways are used to allow access to the lower storage space within the hull for cargo, food and water. Sometimes gratings where incorporated with the hatchway.
These fittings are made up of parts supplied in the kits. There location on the deck is determined from the kit plans.
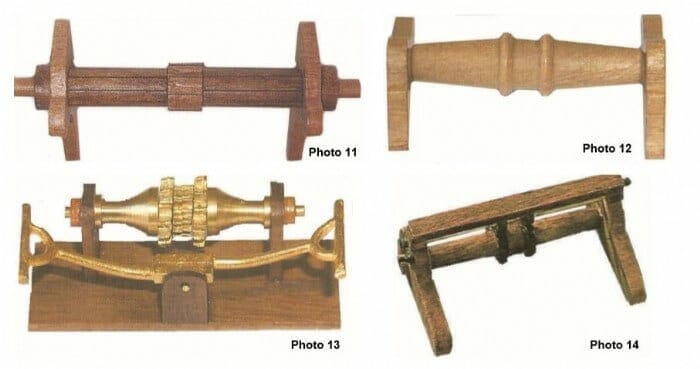
8. Winches
Winches come in a variety of shapes and sizes depending upon the era of the vessel.
Sail winches were used to aid in the trimming of sail yards. Mast winches were fitted at the base of the mast and used to assist raising the main yard on smaller vessels with a limited number of crew.
Anchor winches or windlasses were used to haul the anchors up to the deck line for securing. They were not used on smaller vessels.
A number of anchor winches is presented in Photos 11 to 14 representing a range of eras and vessel types.
The winch will be one of the items supplied in your kit and will need to be assembled.
9. Pumps
Pumps were used to draw water that had accumulated in the bilge of the vessel and to discharge it overboard. Pumps come in a variety of shapes, sizes and pumping mechanism depending upon the era and type of vessel.
A number of pumps is presented in Photos 15 to 17 representing a range of eras.
The pump will be one of the items supplied in your kit.

10. Capstans
A capstan is used to lift items of great weight such as the anchor. The anchor rope or chain is passed around the capstan and the purchase or greater lifting power is gained by the leverage of the wide sweep of the fitted bars.
The capstan will be one of the items supplied in your kit.
Photos 18 & 19 show two types of capstan

11. Anchors
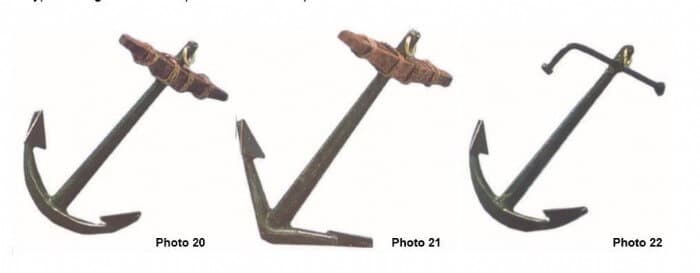
Anchors are large and heavy instruments weighing a number of tons on large vessels. They have been in use on vessels since the earliest times. Anchors are used to hold and retain the vessel in a location. Ships carried multiple anchors of various sizes and shapes. Typical anchors include—sheet, best bower, small bower, spare, stream, kedge and grappling.
More modern vessels use iron chain while earlier vessels used cable laid hemp hawsers 20 to 25cm in diametre or more connected to the anchor ring.
A typical range of anchors provided in a kit is presented below.
12. Cathead
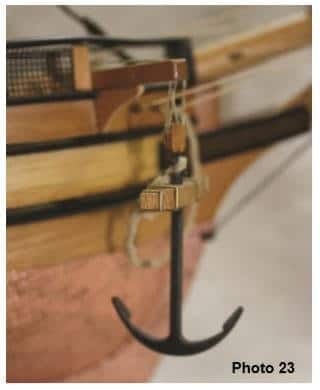
The name cathead comes from the activity of “catting” or securing the anchor head before lifting up the anchor to be stowed. Rope sheaves and pulleys formed part of the cathead block and tackle rigging to lift the anchors into position.
The catheads are fitted a the bow and extend out from the bow. Photo 23 shows the cathead, block and tackle and anchor placed ready to be lowered.
The plans and drawings of your kit will detail how the catheads are to be made and fitted.
The rigging of the anchor to the cathead will also be shown.
13. Rudder & Rudder Hinges
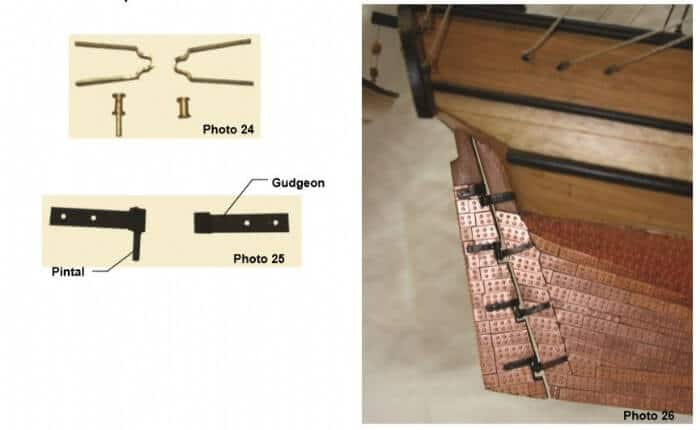
The rudder is usually fitted later in the construction of the model. The rudder is attached to the stern post by rudder hinges. Small brass nails are used to fix the hinge halves to the rudder and stern post. A dab of super glue to the hinge assists holding it in place.
The rudder hinges come in two halves called gudgeons. The pintal is a piece that is the hinge part and joins the two halves together.
Some rudder hinges supplied in a kit have the pintal separate from the hinge—see Photo 24. Other rudder hinges supplied in a kit have the pintal fixed to one rudder hinge—see Photo 25.
It is important to note that the hinge part that has the pintal attached is fitted to the rudder and that when fitting the rudder is hooked onto the hinges fitted to the stern post—see Photo 26. This ensures the rudder will not just fall off.
14. Tillers, Steering Gear & Wheels
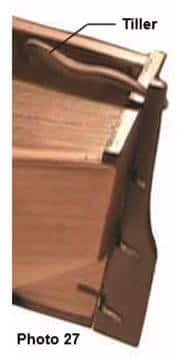
A tiller was the most simple method of steering a vessel. Smaller vessels were steered with a tiller.
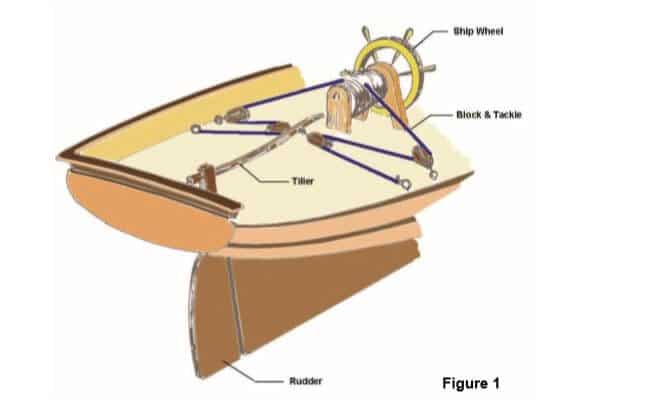
A tiller is a handle that is attached to the top of the rudder so that the tiller is located inboard. With the vessel moving forward the helmsman would simply move the angle of the tiller to change the direction of the rudder and hence the vessel.
Larger vessels were fitted with a tiller that was attached through a block and tackle mechanism to a ship wheel. The tackle was wound around a drum which was attached to the ship wheel. The HMB Endeavour had this type of mechanism. See Figure 1.
Later developments moved the block and tackle mechanism to below the deck.
The exact type of steering gear used was depended upon the period of the ship.
15. Cannons & Carronades
Cannons and carronades were the armament of most ships up to the mid-1850s as there was great rivalry between the seafaring nations of Europe over trade.
If your kit contains armaments the plans and drawings supplied will show how they are assembled and fitted to the model.
Photo 28 is a cannon and Photo 29 is a carronade.

16. Boats
The boats of a ship are small service vessels. Usually a ship carried a number of boats. The boats were classed as long boat, launch, jolly boat, dory, whale boat, captain’s jig to name a few. The boats were rowboats and sometimes they were fitted with a collapsible mast and rigging.
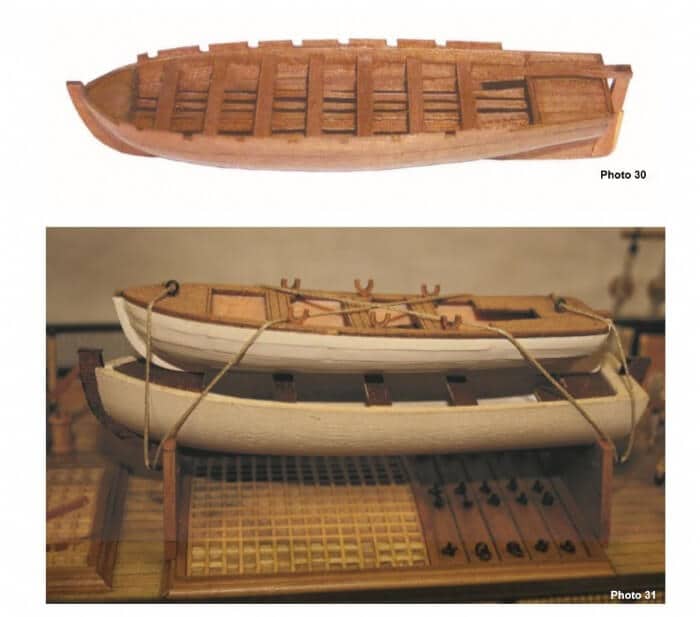
On larger ships the boats were mounted on a boat rack located in the central part of the deck with the smaller boats nestled within the larger boats—Photo 31
Boats supplied in a kit will usually need to be assembled and fitted out. The kit instructions will describe this process. Photo 30 is a typical ship boat supplied in a kit that has to be assembled and fitted out.
17. Davits
Davits were the special cranes rigged to lower or raise the ship boats. Old ships used straight wooden davits on the sides of the vessel. After the 1850s curved iron davits were used widely.
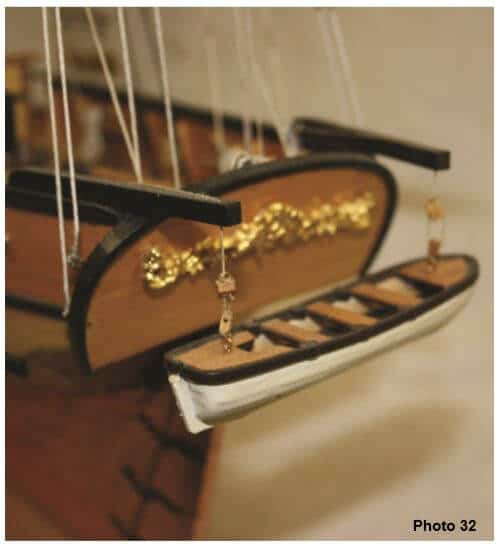
Some vessels such as whalers carried boats outboard on stern davits that were permanently bolted to the after rails— Photo 32.
If your model kit has davits their assembly and location will be shown on the plans and drawings provided.
18. Summary
As stated previously this chapter on deck fittings covered a cross-section of the various types of fittings found in a kit and was not an exhaustive or definitive list.
For larger scale kits more detailed fittings will be able to be presented. Again the exact type of deck fitting presented in a kit will depend upon the period of the vessel being modelled.
Learn The Art Of Building A Model Ship
Get started in wooden model ship building today


